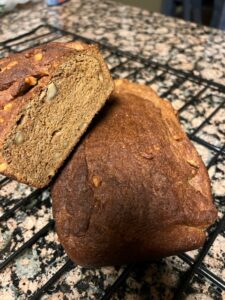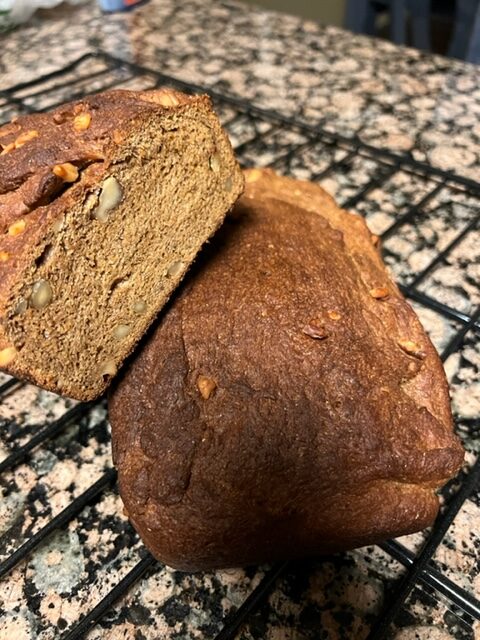
I wanted a substantial bread to go with the Spooky Kabooky – Kabocha Chicken Thai Soup – so I leaned into a dark rye. The challenge with rye is getting a rise out of it. So I studied what others had done and some things I learned from making Japanese Milk Bread to give it a good lift. The results were remarkable – it’s a dense, chewy bread that is not too sweet given the addition of the molasses. It’s also easy to slice thin, making it a nice sandwich bread.
Please make sure to read the recipe before starting to ensure you have everything you need to produce a great outcome.
Time Estimate – start this dough by 10 AM, to enjoy it at dinner. Most of the time to make this bread is in the time to allow it to rise.
Prep – 5 minutes
Make Dough – 20 minutes
Make Bread Loaves – 10 minutes
Prep Equipment (Nice to Have)
- Large Stand Mixer (optional – knead dough by hand and get great results – I prefer the large pro version of the Kitchen Aid as I have had the engines overheat and shut off on the smaller mixers when making bread)
- Incubator for bread rising (optional – you can create a warm moist incubation environment with a pot of boiling water in an unheated oven)
- Temperature Probe (no real option for this – it’s the only way to know if the bread is done – most grocery stores have a low-cost digital temp probe)
Ingredients (makes 2 large loaves – 9 x 5 bread pan)
- 1 package quick acting yeast
- 1/2 cup warm water (Between 95 F and 110 F)
- 1 TBS organic brown sugar
- 2 cups organic dark rye flour
- 2 cups organic white bread flour
- 1 cups vital wheat gluten (I’ve had a hard time finding this in grocery stores lately).
- 1 tbs sea salt
- 1 tbs chia seeds
- 1 cup organic buttermilk
- 1/2 cup organic cultured butter
- 1/4 cup organic unsulphured molasses
- 1/2 cup chopped walnuts
Directions
- Proof the Yeast – mix the yeast in the warm water with the tablespoon of brown sugar. When it starts to bubble, you know the yeast is working and is good to use for making your bread.
- Put the buttermilk, molasses and 1 stick of the butter into a pan and heat and stir until the butter and molasses are melted into the buttermilk. Remove from heat and wait until the temp has dropped to where it’s the same temp as your skin.
- Mix the organic white flour, vital wheat gluten, dark rye flour, salt and chia seeds. You absolutely need the gluten and the white flour for this dense bread to be bread like rather than brick like.
- Add the proofed yeast, buttermilk, molasses, and butter mixture into the flour mixture.
- Mix to thoroughly combine all the ingredients – either by hand or with the dough hook on the kitchen aid mixer.
- Knead the dough by hand or with the mixer for about five minutes – adding more white flour a tablespoon at a time to keep the dough from being too sticky – it should be soft but not sticking in big globs on your hands.
- Let the dough rest for about ten minutes. Resting is an important step for the proteins in the gluten and the white flour to interact with the proofed yeast.
- Add the walnuts to the dough and knead for another ten minutes, mixing the nuts throughout the dough.
- Raise the dough.
- Get a glass, ceramic or plastic bowl big enough for the dough to double in size. Coat the bowl in melted unflavored coconut oil, or butter. Put the dough in the bowl and make sure to get the oil all over the dough (this helps the dough rise better by preventing the rising dough from sticking to the side of the bowl).
- Cover the bowl with saran wrap.
- Find a warm environment for the bowl (around 85-95 degrees) – the incubator is great for this. Or boil two quarts of water in a pan, and put it and the bowl with the bread in an unheated oven.
- Let the dough rise until it is double in size (takes 2 – 3 hours)
- Split the dough into two sections.
- Grease two large bread pans (about 9″x5″).
- Roll dough into a form to fit into the base of the bread pan (it should take up about 1/3 – 1/2 of the height of the bread pan)
- Cover the bread pan with plastic wrap. Let the dough come to a second rising in your incubator or unheated oven – this usually takes 2 – 3 hours for it to rise to the top of the bread pan.
- Cook the loaves.
- Pre-heat the oven to 375 F
- Cook for 20 – 30 minutes or until the loaves are done (200 F internal temperature – I always test this as it’s the only way to really know if they are done).
- Cool the loaves – tip the loaves out onto a wire rack and let cool before cutting into it.
- Using a good serrated bread knife, slice into desired thickness. For sandwiches, I keep it under 1/2 inches. For a hearty slice with a bowl of soup, cut it an inch thick. This bread pairs well with cheese, butter, or apple butter.


Comments