
I’ve been making bread for the past 50 years (a damn long time). I’ve experimented many times with sour doughs and have always failed. I’ve also experimented with sprouting and milling my own grains and only succeeded in making a decent loaf of bread with those by incorporating gluten and using commercial yeasts.
I recently became more interested in sourdough breads because of research showing sourdough breads have a lower glycemic index than conventional bread (which means sourdough bread does not create a big spike in blood sugar like conventional bread does – this creates weight gain and is a problem for diabetes). The best result came from sourdough breads made with whole grain organic flours.
So I had a sourdough starter going – but I didn’t like that I had to use conventional, very processed white flour to make the sourdough starter. Plus, what I had read about sour dough starters, is it takes at least two months to have it be “vibrant” enough for bread. I was using my sourdough starter though with conventional yeast and making my Japanese milk breads – which I thought might be better than nothing, but it still was not really a “sourdough.”
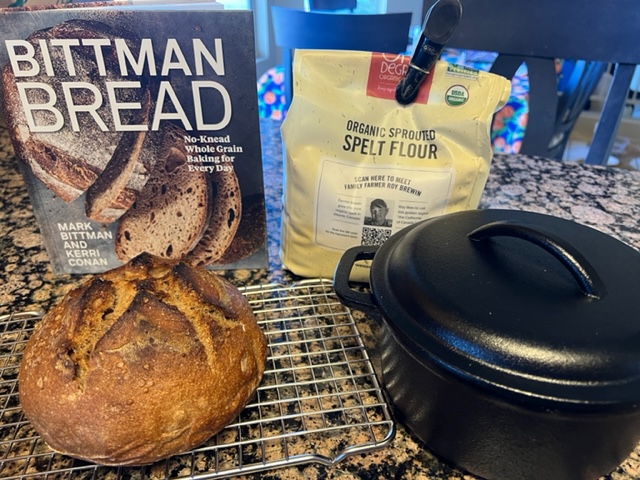
So I was intrigued when I read about the “Bittman Bread” approach in a New York Times Article. It used an easy to make sourdough starter, and ONLY used whole grains (with a little salt). I purchased the book – Bittman Bread: No-Knead Whole Grain Baking for Every Day
I started reading it less than a week ago and went to work on their suggestions. First, you make a loaf of bread to get a starter going – using white flour. But it’s more than just to get the starter going – it helped me learn some of the more unusual techniques. Then you feed the starter for the next several days using whole wheat flour. By whole wheat flour, I took it to mean the whole grains ground up with nothing removed. So I pulled the “sprouted spelt flour” out of my flour bin and used that. (Since it was over two years old, I did purchase a new bag for the first loaf).
The technique requires using a 2 quart cast iron dutch oven. While I used my very large dutch oven for that first “learner” loaf, I wanted to stick to their technique, so I purchased a small, inexpensive 2 quart cast iron dutch oven I found on Amazon – here is the link.
By last night my starter was ready to go, so I made my “jump starter” for the first “real” loaf. Everything is measured out precisely by grams so I pulled out the kitchen scale and followed along. It uses far more water than I am used to using. Plus, I’m a bit of an “artisan” and am very used to winging it. Fifty years of some success (and many failures) had made me a bit cavalier where making bread was concerned.
I figured it was time for a bit of caution and following the lead by someone who professed to have had success with making a 100% whole grain sour dough (and in such a short amount of time – the sour dough starter I had started a few weeks back said I’d need two months for it to really be “ready.”)
True confessions – I substituted some whey I had recently accumulated from making ricotta rather than the water though. I had heard whey is great for feeding good bacteria when fermenting veggies, I figured it might be good for this too. PLUS, I have had great luck the past couple years with Japanese Milk breads and figured I’d give myself an extra “edge” here.
You need to let the “jump starter” sit for 8 – 12 hours. I let mine sit for 12 hours. It looked exactly like the picture in the book so I proceeded. I continued to use the whey rather than the water, but followed their weight measurements precisely. The dough was so much wetter than I was used to.
Their technique for keeping your hands wet while you work with the dough worked much better with this batch than it did with Sunday’s practice loaf (I had used in part a sour dough starter I had already started and added the recommended package of yeast into the start the starter loaf). Plus, on Sunday the recipe for the starter loaf used dry measure rather than weight – which I rather ignored and relied on my experience of what the dough “should” look like and I think I messed it up by not keeping my hands wet enough.
So this morning, I committed to doing things the “Bittman Way” with respect to rising my first loaf of whole grain sour dough. It takes four different “kneads” – more so just folding the dough with wet hands. Which works to incorporate more water into the dough. It’s seriously fun watching the transformation of the dough. And this time, the dough did not stick to my hands – it responded exactly as the book said it would.
The next step used the little cast iron dutch oven. It’s so damn cute. I did what they suggested and lined it with parchment, put the worked and airy dough ball into the middle of the pan, and let it rest for a half hour. Then I took out my kitchen scissors, cut an X in the top, put the cast iron lid on and popped into a cold oven sitting on top of my cold pizza stone – which felt like sacrilege. Set the oven to 485 and put the timer on for 30 minutes.
Voila – at the end of 30 minutes, the top looked precisely like they said it would. I took the cover off, cooked it for another ten minutes. At the end of that ten minutes, I followed their instructions and took it out of the cast iron pan, put it onto the very hot pizza stone and turned the oven down to 400. At the end of 15 minutes, I checked the internal temperature – it was at 200 F, so I turned the oven off and waited for the internal temp to get to 205 F, then took it out.
The instructions suggest letting it cool for several hours (well I tell you that was the longest several hours I’ve experienced as who can wait several hours to cut into a fresh out of the oven loaf of bread)? I busied myself far away from the kitchen. But what a delight. The bread is light, with an airy, chewy crumb, and amazing flavor. I have entered a new nirvana!